
Entering a timecard is quick and easy with GreenSlate.
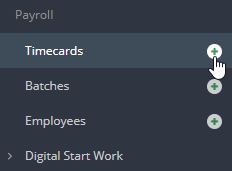
Step 1: Click the "+" next to TIMECARDS, under Payroll on the left navigation menu.
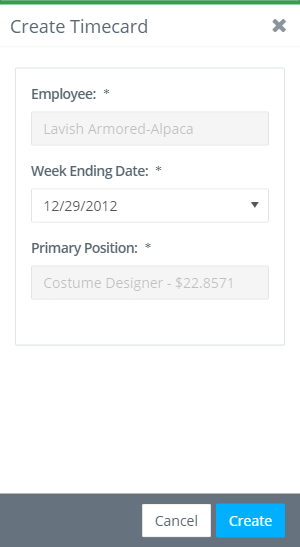
Step 2: Choose your week ending date, your position, and Click CREATE. NOTE: Your Primary Position is the position you are filling out the timecard for. Don't see your position? Continue filling out the timecard and add a Note on the next page in the Notes section.
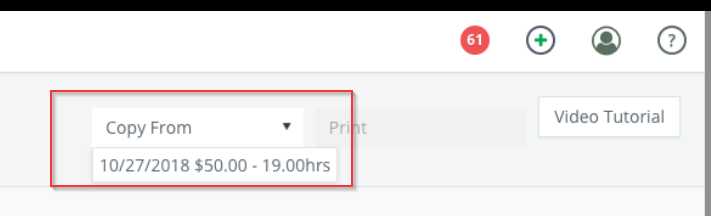
If this timecard will have the same hours as a previous week, click COPY FROM in the upper right then select the timecard to copy. You will be able to select from the 4 most recent timecards processed.
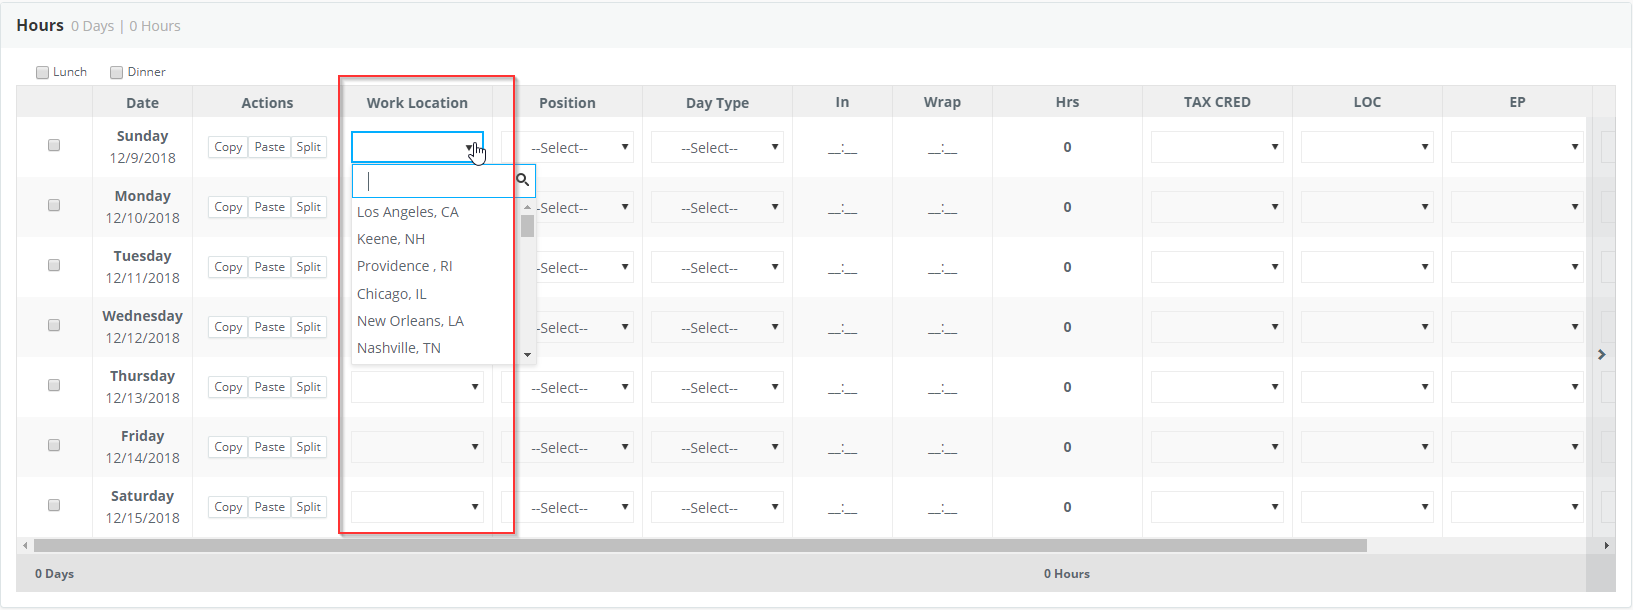
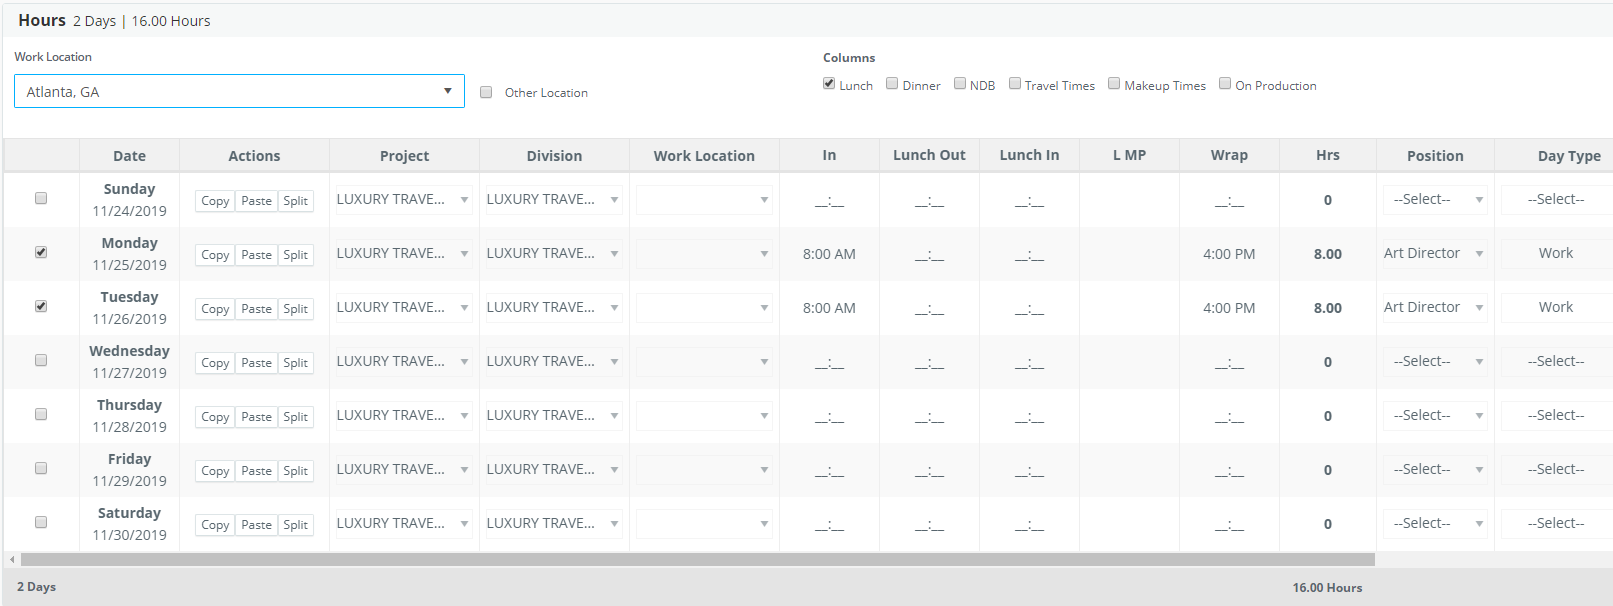
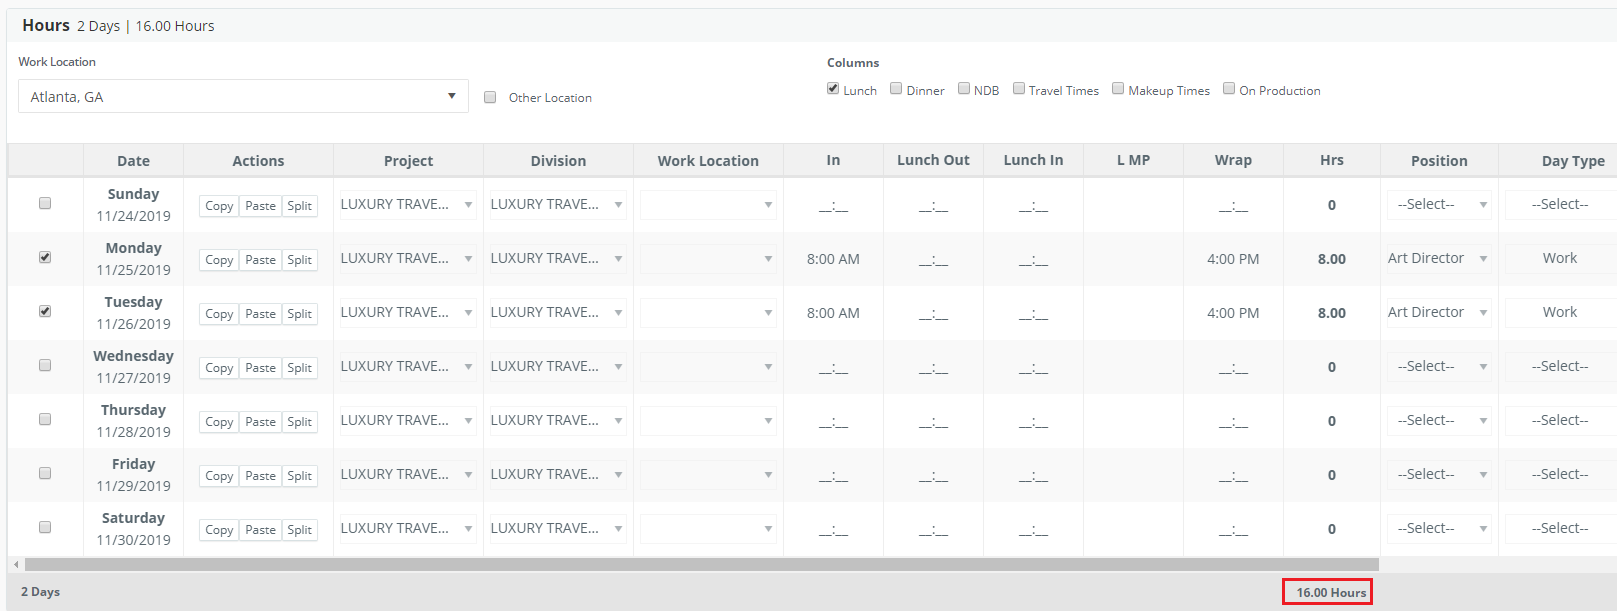
Step 3: Choose the Work Location from the drop down menu or select OTHER LOCATION if it is not available.
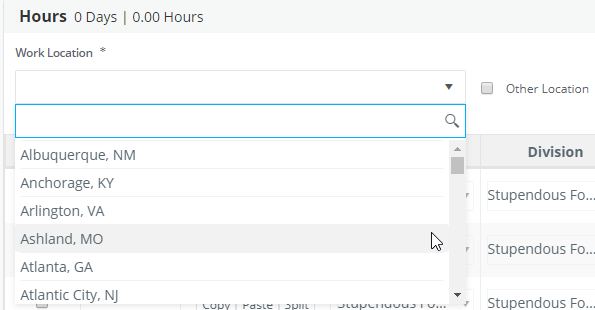
If you worked at multiple locations in one week, select each location from the Work Location column for each day.
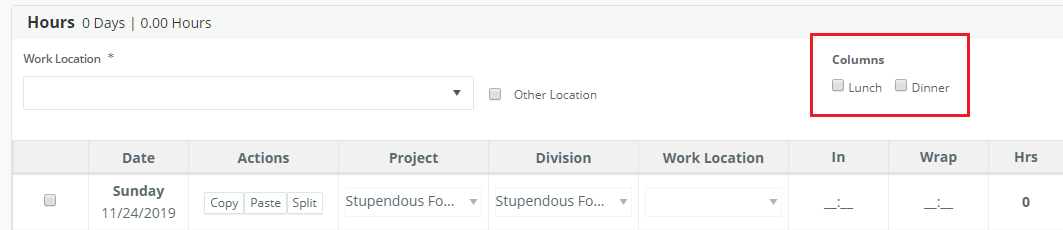
Step 4: Check the Lunch and/or Dinner box if applicable for days during this week.
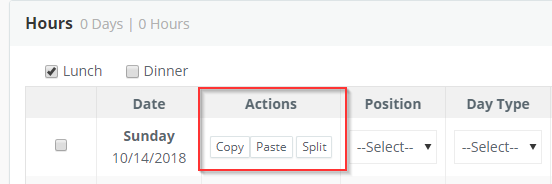
Step 5: Fill out the timecard hours accordingly. NOTE: Actions can be used to copy from one day then paste to another. Split can be used to divide a day if for example, two different positions were worked on the same day or half a day was a prep day. NOTE: Daily and Weekly rate employees will not enter in and wrap times. Only total hours worked.
Times can be entered in military time or by using AM and PM.
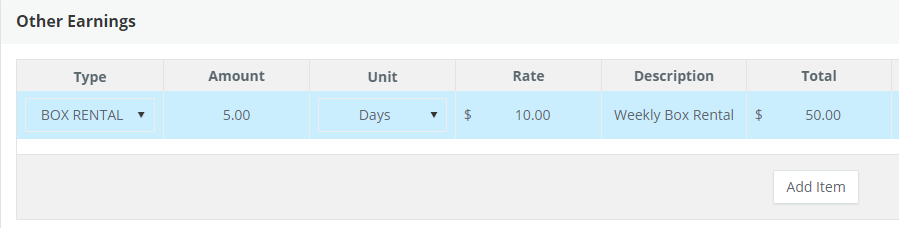
Step 6: In the Other Earnings section, click ADD ITEM. Select the Type and enter the Amount (number of days), the Unit, Rate and Description.
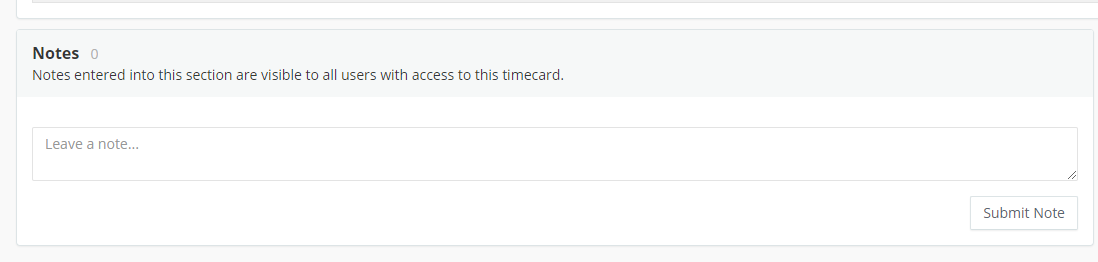
Step 7: Use the Notes section to make any notes for your employer and click SUBMIT NOTE. For example:"My position wasn't listed."
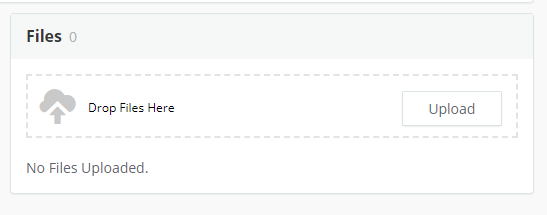
If you would like to add an attachment to the timecard, click UPLOAD in the Files section or drag and drop a file.
Step 8: Verify your Total Hours are correct.
Step 9: Click SUBMIT.

NOTE: You also have the option to save a draft of your timecard if you are not ready to submit your hours by clicking SAVE DRAFT.

If you click SUBMIT and the page does not refresh with the message that the timecard was submitted successfully, please review the timecard to make sure you are not missing any required information, such as the work location. There will be an error message at the top of the page if required fields are not complete.
Step 10: Upon submitting your timecard, a window will open in which you can sign by holding the left mouse button if you are on a desktop computer or with your finger if you are using a mobile device. Once you sign your timecard, it will become read-only for your employer. If your employer notices any changes that need to be made, he/she will reject the timecard back to you with notes.

If you've made a mistake on your timecard, you can access your timecard again by clicking VIEW from the Timecards page and then click EDIT to make changes. This option is only available if your timecard has not yet been approved by your employer.

