
- Help Center
- Accounting
- Assistant Accountant/Department Head
How to: Create a Bill Payment
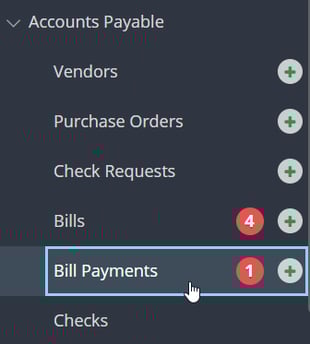
Step 1: From the left navigation, under Accounts Payable, click BILL PAYMENTS.
Step 2: Click PAY BILLS in the top right of the screen.

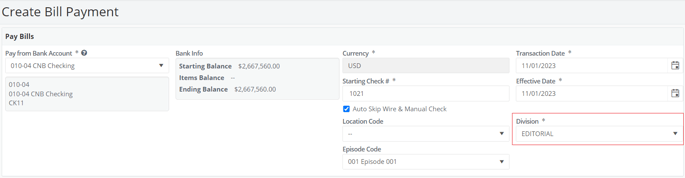
Step 3: Select the Pay From Bank Account and enter the Starting Check #.
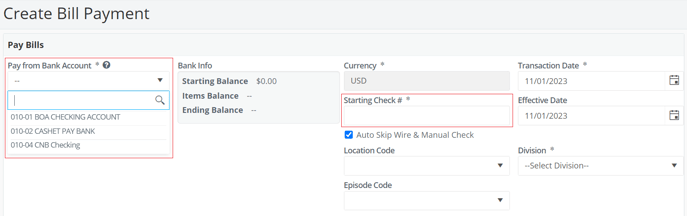
Note: Once the bank account is selected, the next check number for that account will appear in the Starting Check # field, when applicable.
Step 4: Select the Division.
Note: The selected division can determine the approval chain for any given bill payment. Division is only required to be selected when your project uses Divisions. To learn more about Divisions, click here.
Step 5: Click ADD BILLS.

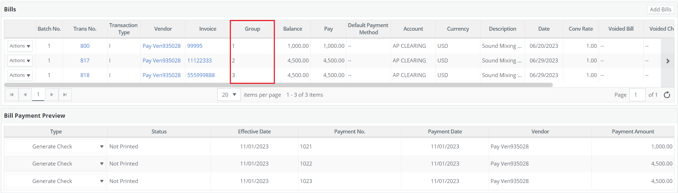
Step 6: Select the bills you would like to pay then click ADD BILLS.
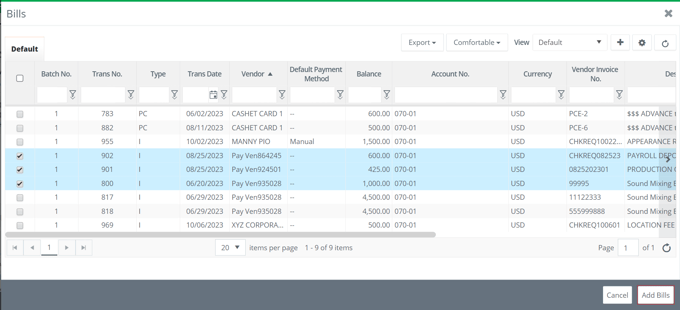
Note: If the bills are for the same vendor and you would like to print separate checks, use the Group column.
Step 7: Click SUBMIT.

