
With GreenSlate, you may generate and print annual AP vendor 1099s using your own computer and printer. You may also take advantage of our convenient e-filing service.
How to: Print AP Vendor 1099s
How to: E-File AP Vendor 1099s
How to: Print AP Vendor 1099s:
Once you have completed your review of the accounting reports "Transaction Edit List By All Accounts" and the "Vendor Check Register", and all 1099 coding of necessary transactions have been updated, you may follow the steps below:
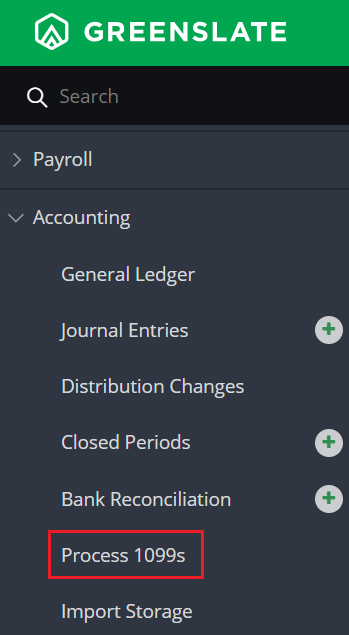
Step 1: Under Accounting, click “Process 1099s.”
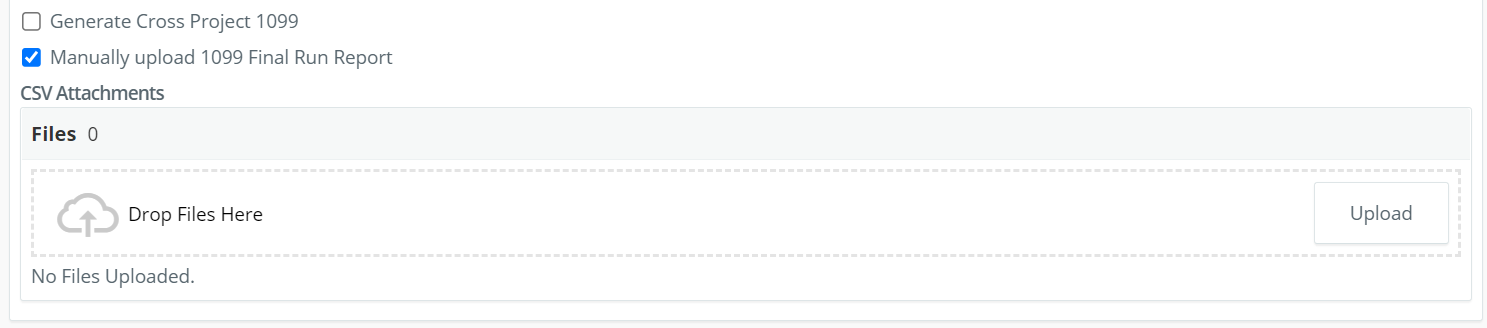
Step 2: Fill out all information in 1099 Client Info text fields.
Note: If you wish to Generate Cross Project 1099s or Manually upload 1099 Final Processing Reports, check the applicable checkbox.

When generating Cross Project 1099s, you can choose desired projects under the same company.
If you are manually uploading an Excel file:
- Click the checkbox, "Manually upload 1099 Final Run Report."
- Then click "Upload" and browse to your Excel 1099 data file OR simply drag & drop that data file into "Drop Files Here".
Step 3: Click “Process 1099s.”

The zip file(s) will be available in My Downloads under My Profile, from the left navigation.

- The 1099 MISC and 1099 NEC forms will both be generated.
- Current year 1099 forms may be purchased at retail office suppliers, or online.
- GreenSlate does not support or generate FIRE files.
- GreenSlate offers a 1099 filing service! Inquire at 1099@gslate.com, or see the instructions below on How to: E-File AP Vendor 1099s.
- Filers of 10 or more information returns of any type for a calendar year will need to file electronically with the IRS. Learn more in the blog here
How to: E-File AP Vendor 1099s:
Once you have completed your review of the accounting reports "Transaction Edit List By All Accounts" and the "Vendor Check Register", and all 1099 coding of necessary transactions have been updated, you may follow the steps below:
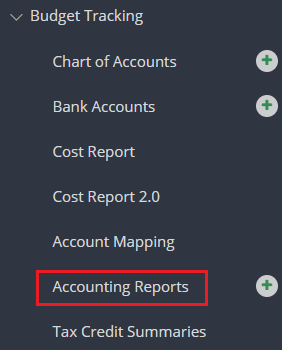
Step 1: Under Budget Tracking, click “Accounting Reports.”
Step 2: Toward the top right hand corner, click “Run Report.”

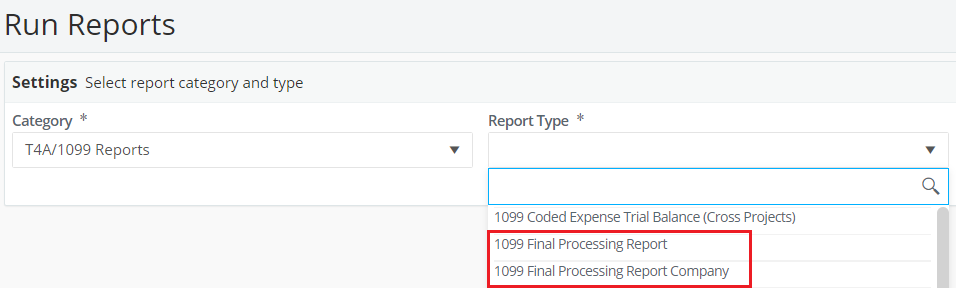
Step 3: Select the “T4A/1099 Reports” report category, and “1099 Final Processing Report” or “1099 Final Processing Report Company”, if you are processing for a multi-project company.
Step 4: Select “Range of Dates”, then enter the applicable calendar year date range you are processing for.

Step 5: Click “Queue Report.”

Step 6: Under Budget Tracking, click “Accounting Reports.”
Step 7: Click the hyperlink from the Excel File column to download the necessary file.

Step 8: Under Accounting, click “Process 1099s.”
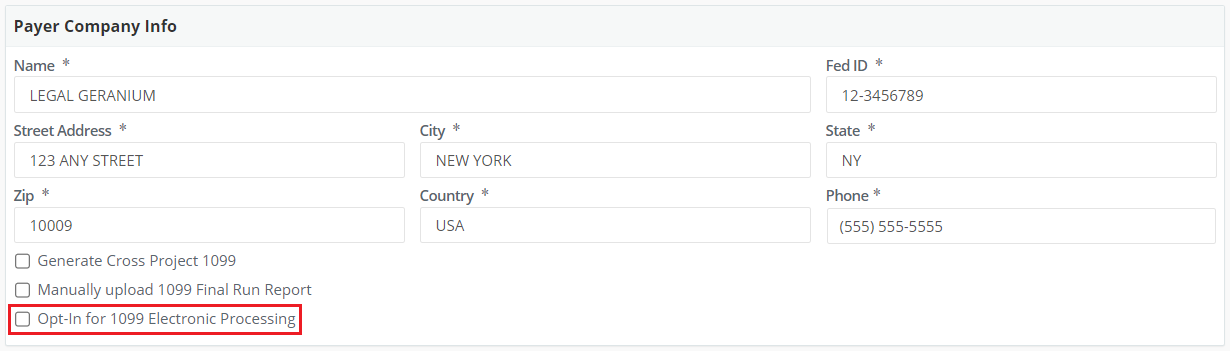
Step 9: Enter your company information, then click “Opt-in for 1099 Electronic Processing.”
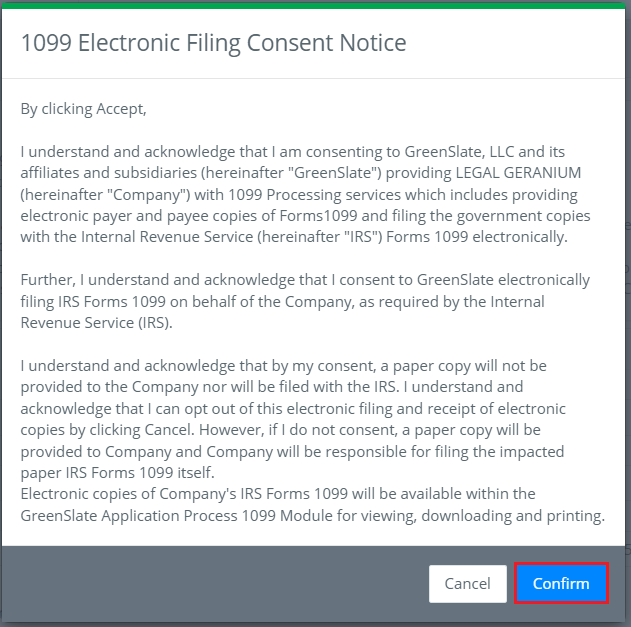
Step 10: Review the 1099 Electronic Filing Consent Notice, then click “Confirm.”
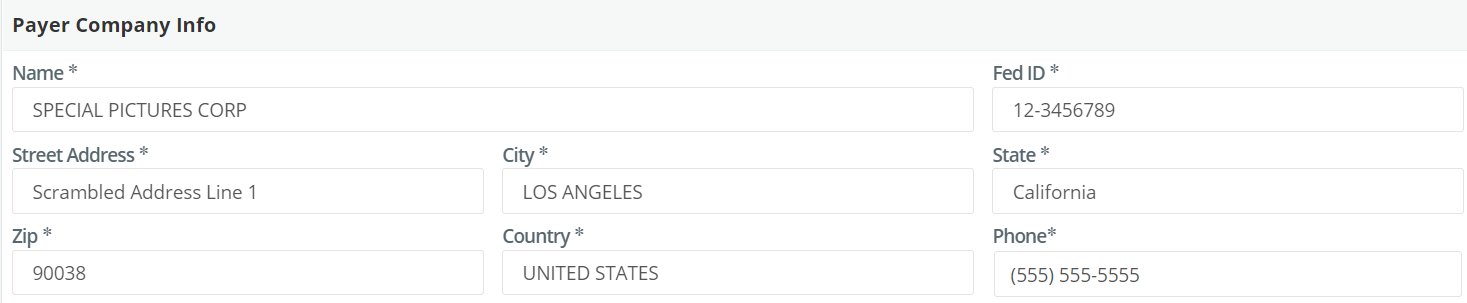
Step 11: Upload the 1099 Final Processing Report into the file uploader and fill out the Payer Company Info fields.
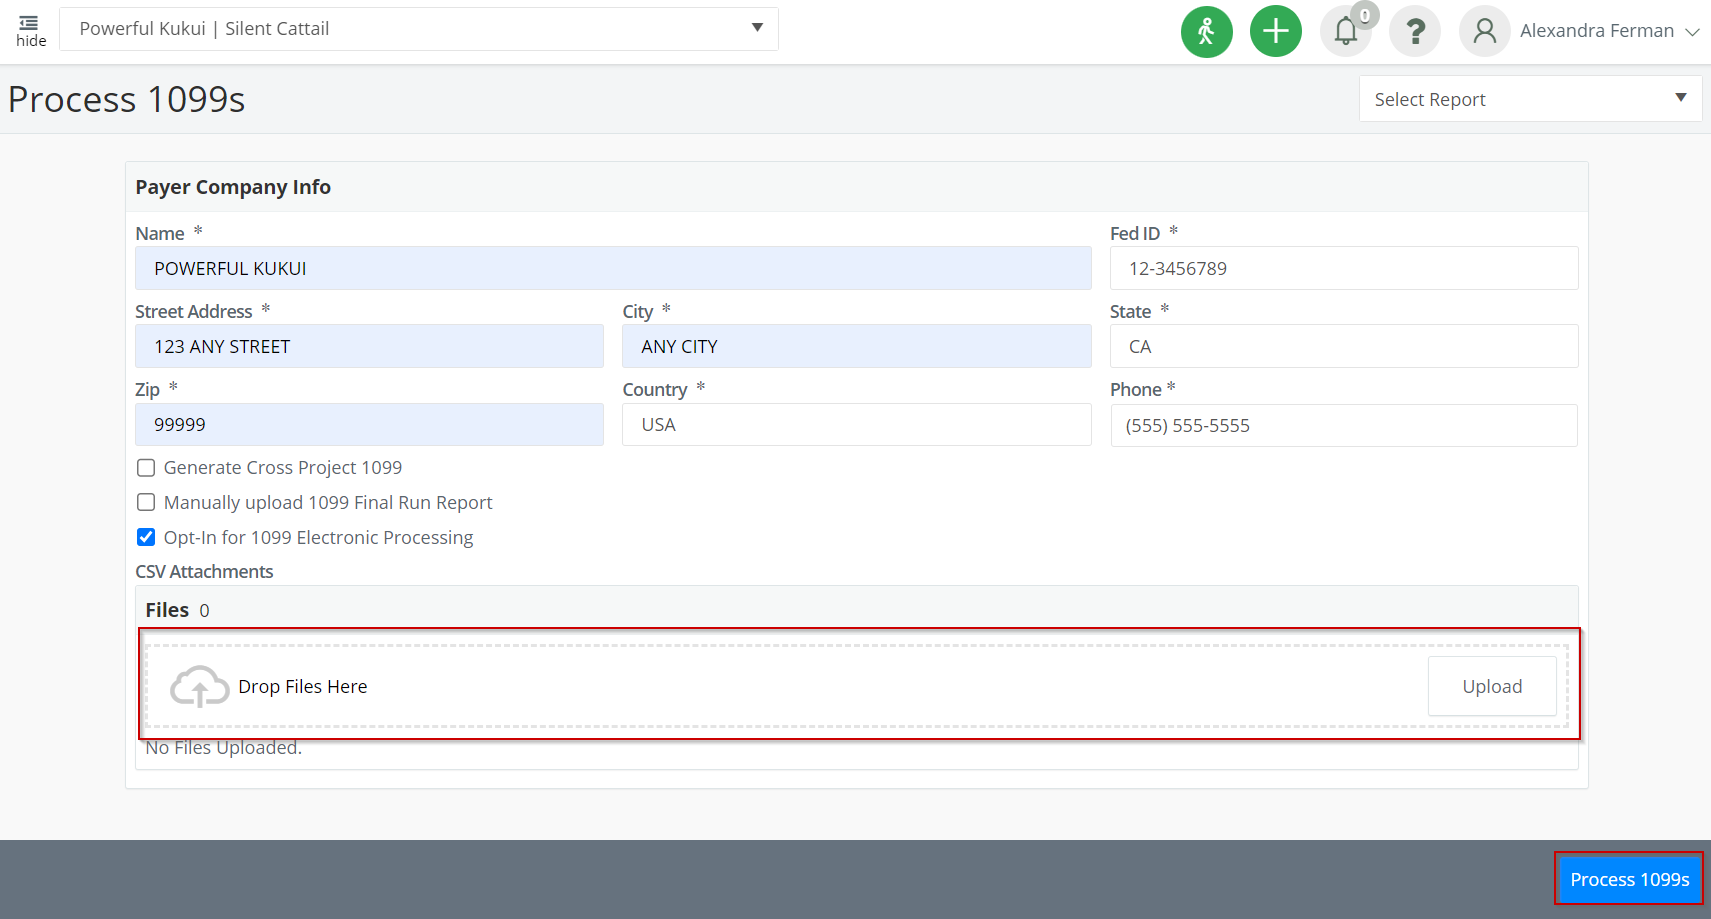
Step 12: Click “Process 1099s.”
Step 13: Once the draft 1099s are available, you will receive an email from our Accounts Receivable team. The email will contain the bill for processing, and a link to preview the 1099s to be processed. Review the draft 1099s, and pay our Accounts Receivable team once you are ready.
Step 14: GreenSlate will E-File your 1099s, and the final 1099 file will be shared securely, for your records, here. You’ll be emailed once processing is complete.