
As a Paramount accountant, it is important to understand the technical accounting procedures in order to have a seamless integration experience. This article covers topics related to CASHétPay to help you be successful.
Set Up Bank Account CASHétPay
Submit Bill Payments CASHétPay
Approve Bill Payments CASHétPay
Submit Bill for CASHétPay Direct Debit
Submit Vendor Credit for CASHétPay Direct Debit
Set Up Bank Account for CASHétPay:
1. On the left navigation pane go to Budget Tracking > Bank Accounts: 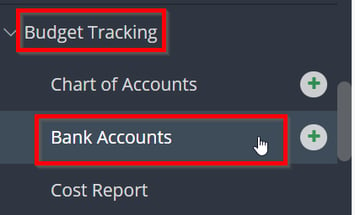
2. Click Add Account.
3. Enter CASHETPAY in the Bank Name field. Then select CASHétPay in the Bank drop down, select USD from the Currency drop down, select UNITED STATES in the COUNTRY drop down, enter a Bank Code and select a GL Account Code to link to the bank account. 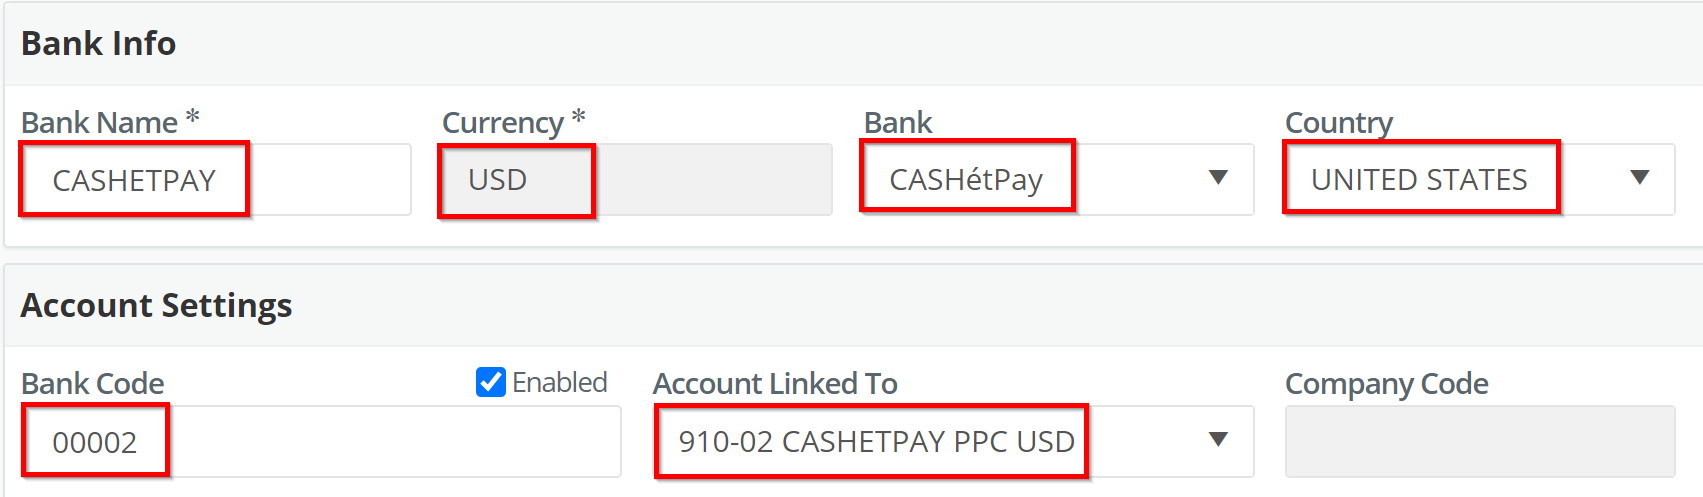
Tip: a bank code can be manually entered or auto-generated when the bank information is saved in step 7.
4. Select the Enabled box under Payment File and enter the Company Name. Enter the project ID number provided by GreenSlate support in the Account No. field. 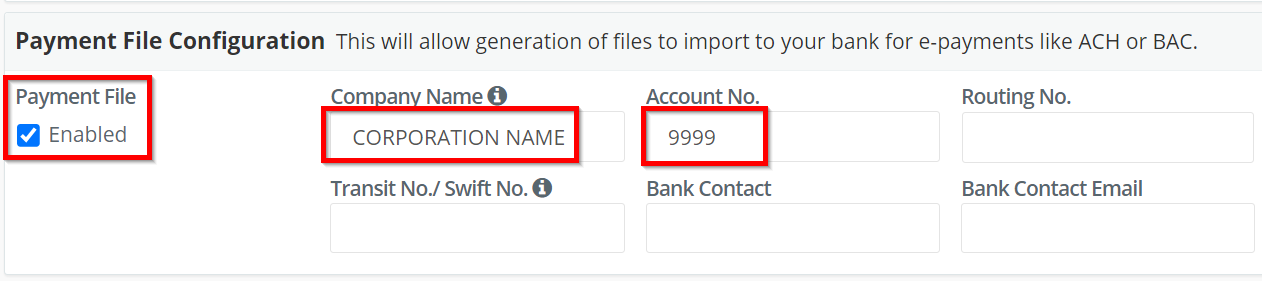
5. Select Enforce Range in the Payment File Ranges section and enter the SAP bank code as the Prefix along with the SAP Starting and Ending check range range. 
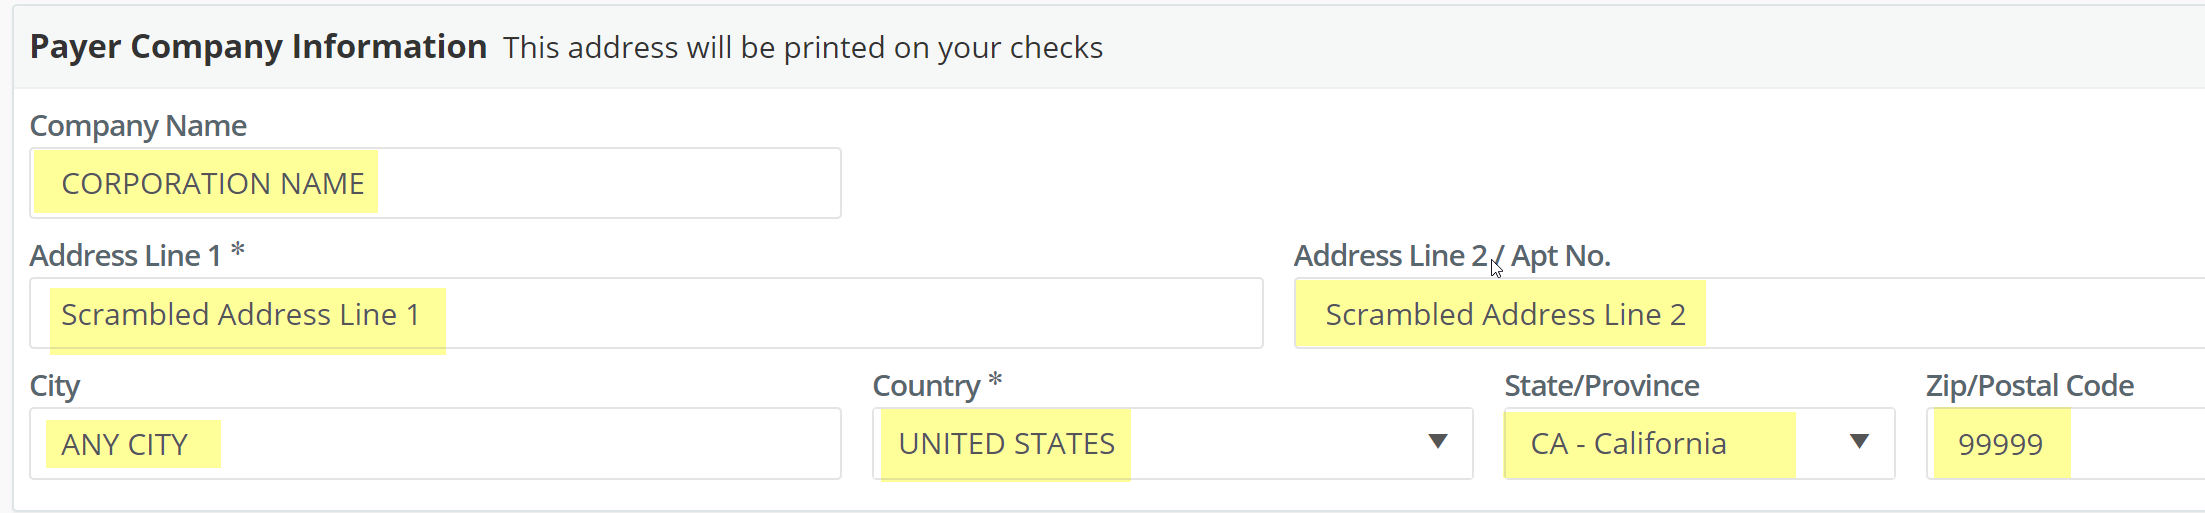
6. Enter the Payer Company Information.
7. Click Save.
Submit Bill Payments - CASHétPay:
1. On the left navigation pane, go to Accounts Payable > Bill Payments. 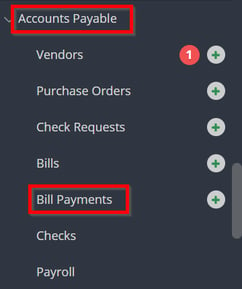
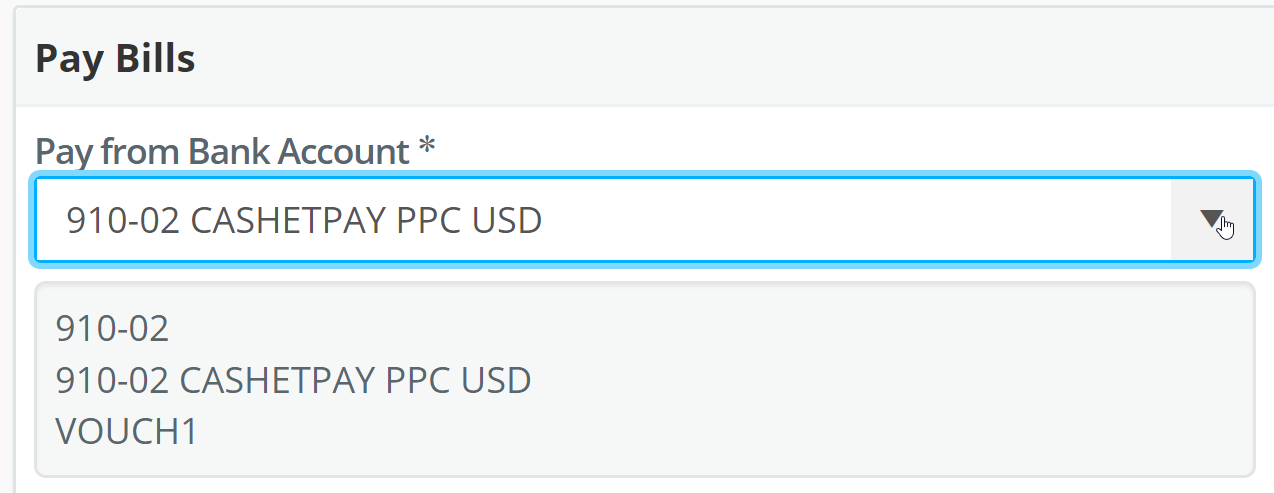
2. Click on Pay Bills. 
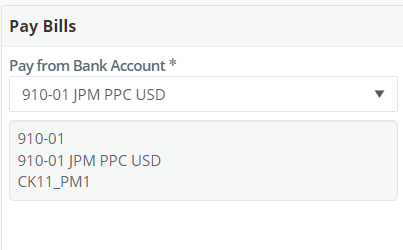
3. Select the GL Account Code linked to the CASHétPay bank account. (See Step 3 in Set Up Bank Account for CASHétPay.)
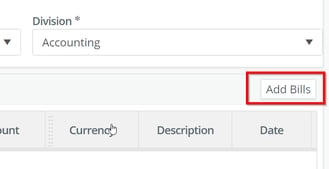
4. Select the Division.
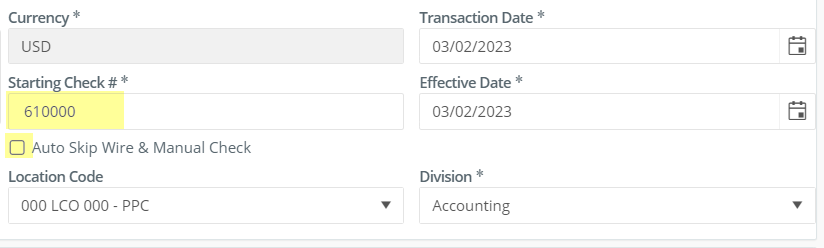
Tip: when creating a bill payment for the first time, the Starting Check # will need to be manually populated. See Step 5 in Set Up Bank Account for CASHét.
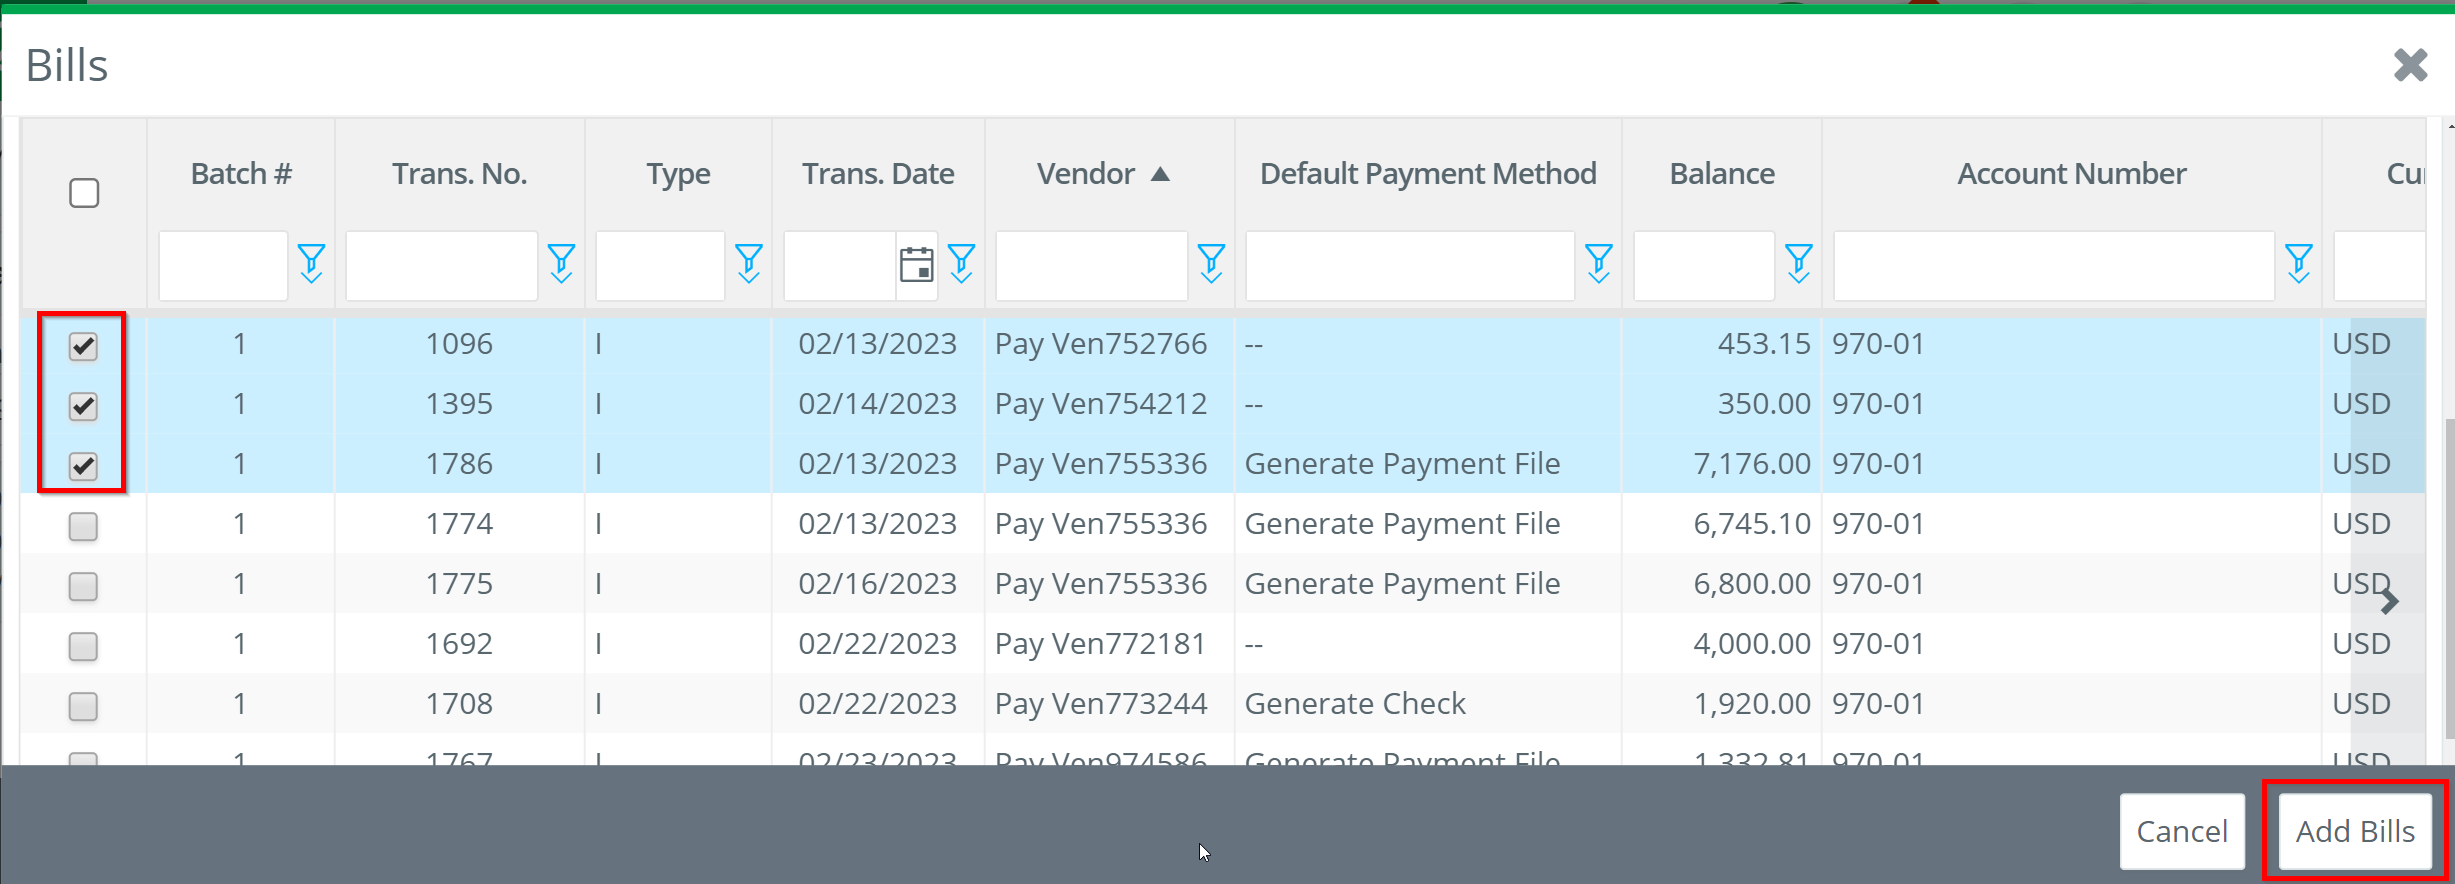
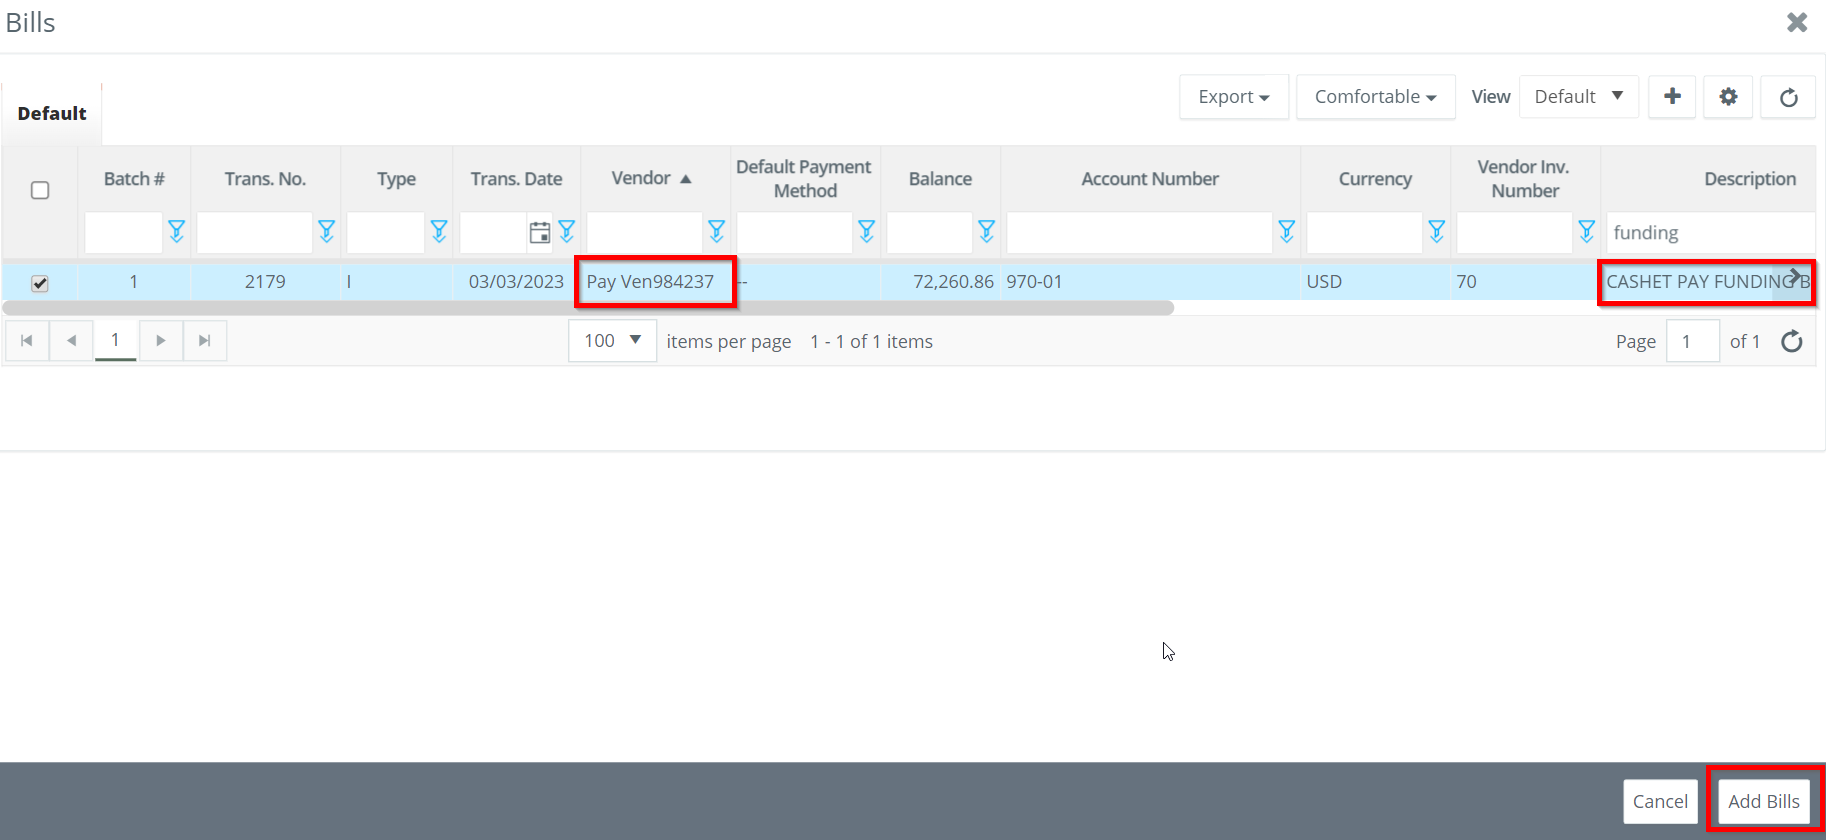
5. Click Add Bills.
6. Select bills to pay and click Add Bills button in lower right hand corner.
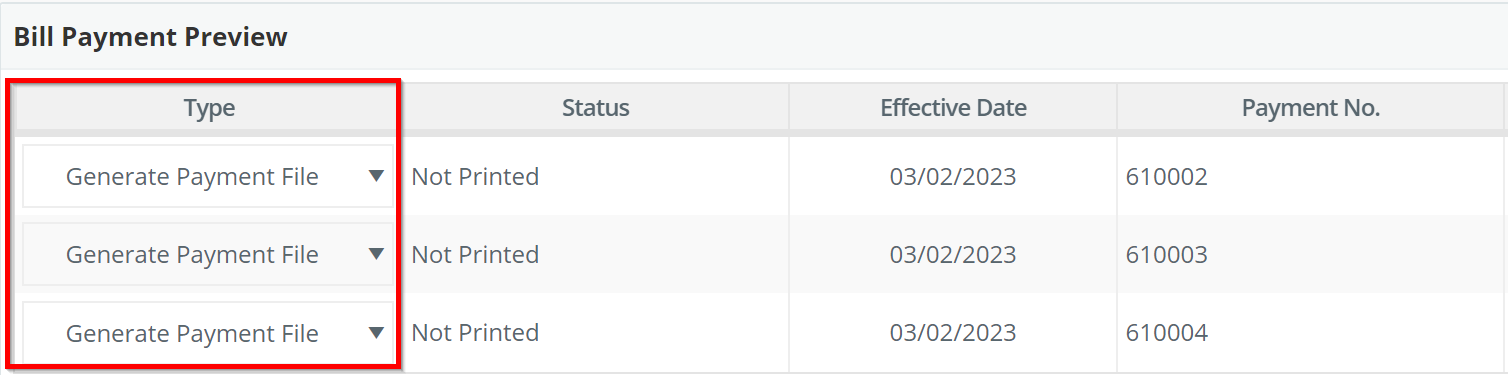
7. Confirm Generate Payment File is selected in the Type drop down under the Bill Payment Preview section.
Note: CASHétPay MUST be enabled for the vendor before creating a bill payment. See Step 6 in Approve New AP Vendor.
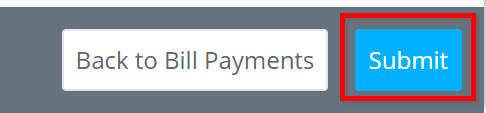
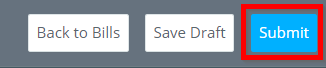
8. Click Submit.
Note: once the bill payment has been fully approved, the payment file will automatically transmitted to CASHét by the GreenSlate system. The status column will update to Completed. No further action is needed.

Approve Bill Payments - CASHétPay:
1. On the left navigation pane, go to Accounts Payable > Bill Payments.
2. Click REVIEW for the Bill Payment to be reviewed.
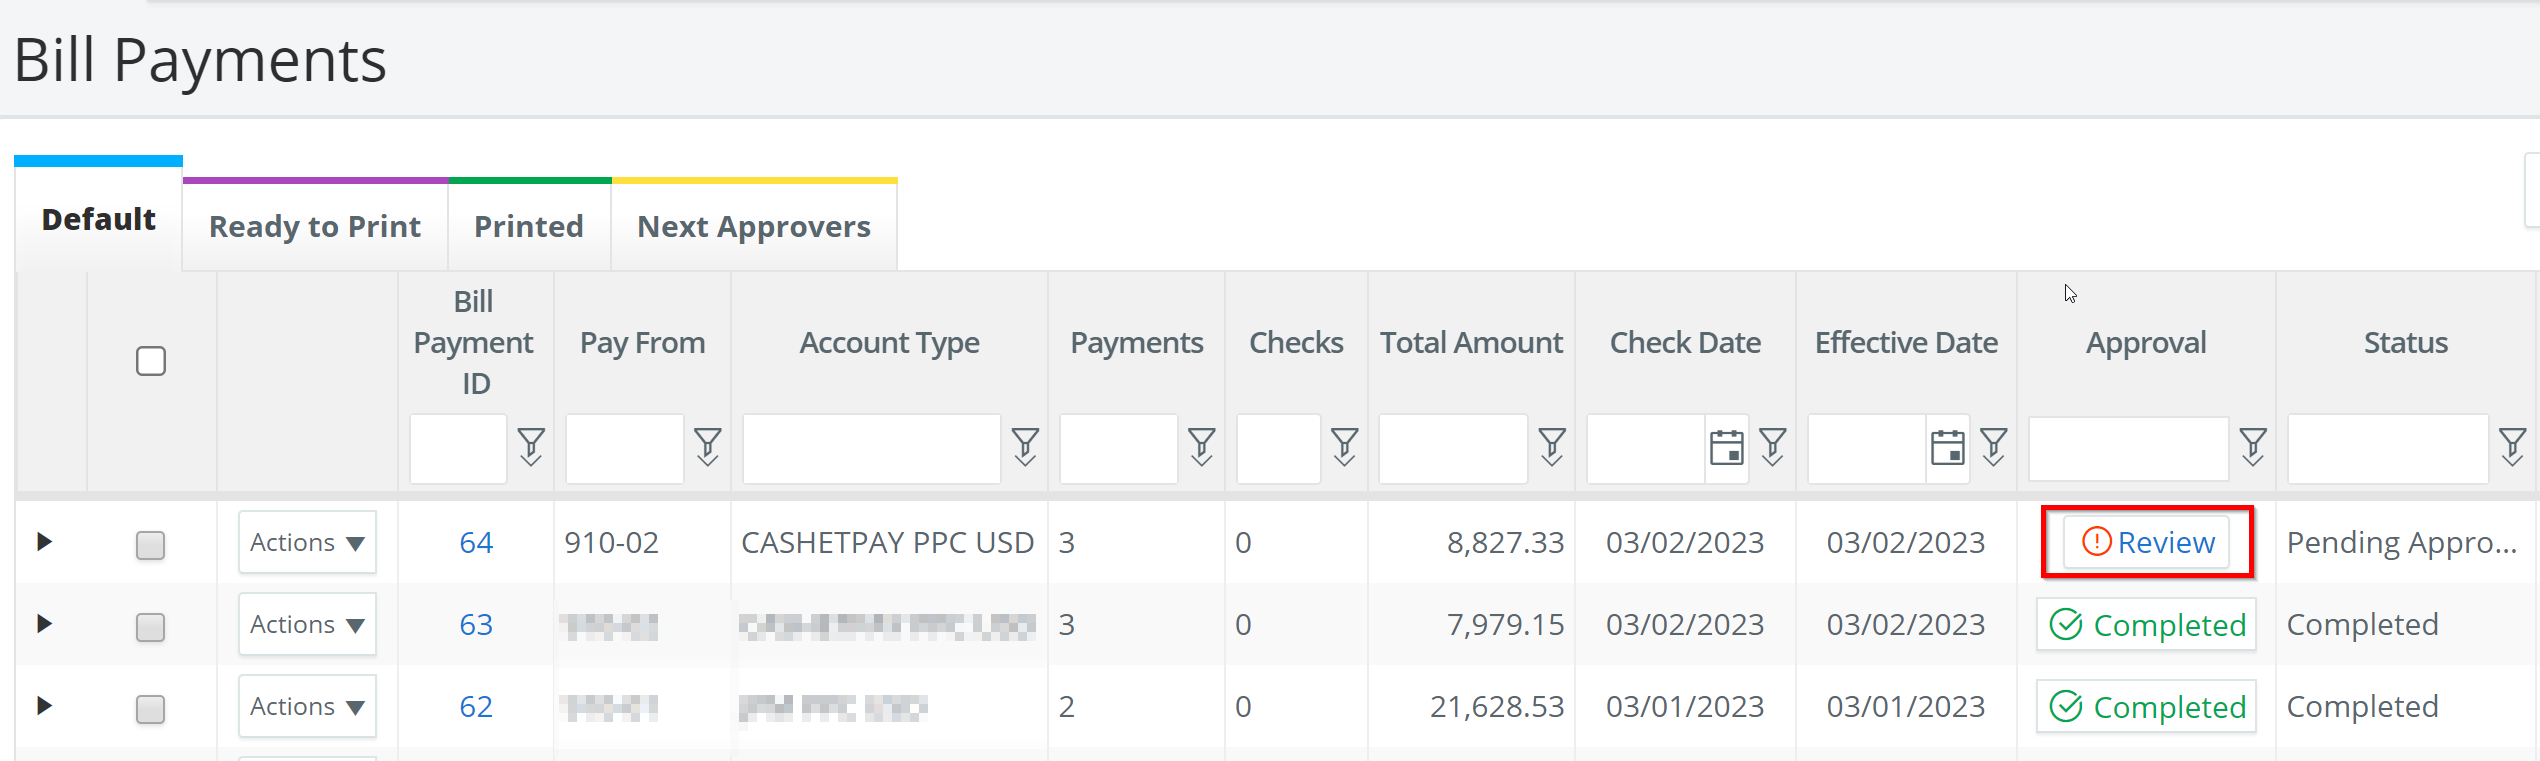
3. Review information in the bill payment screen for accuracy.
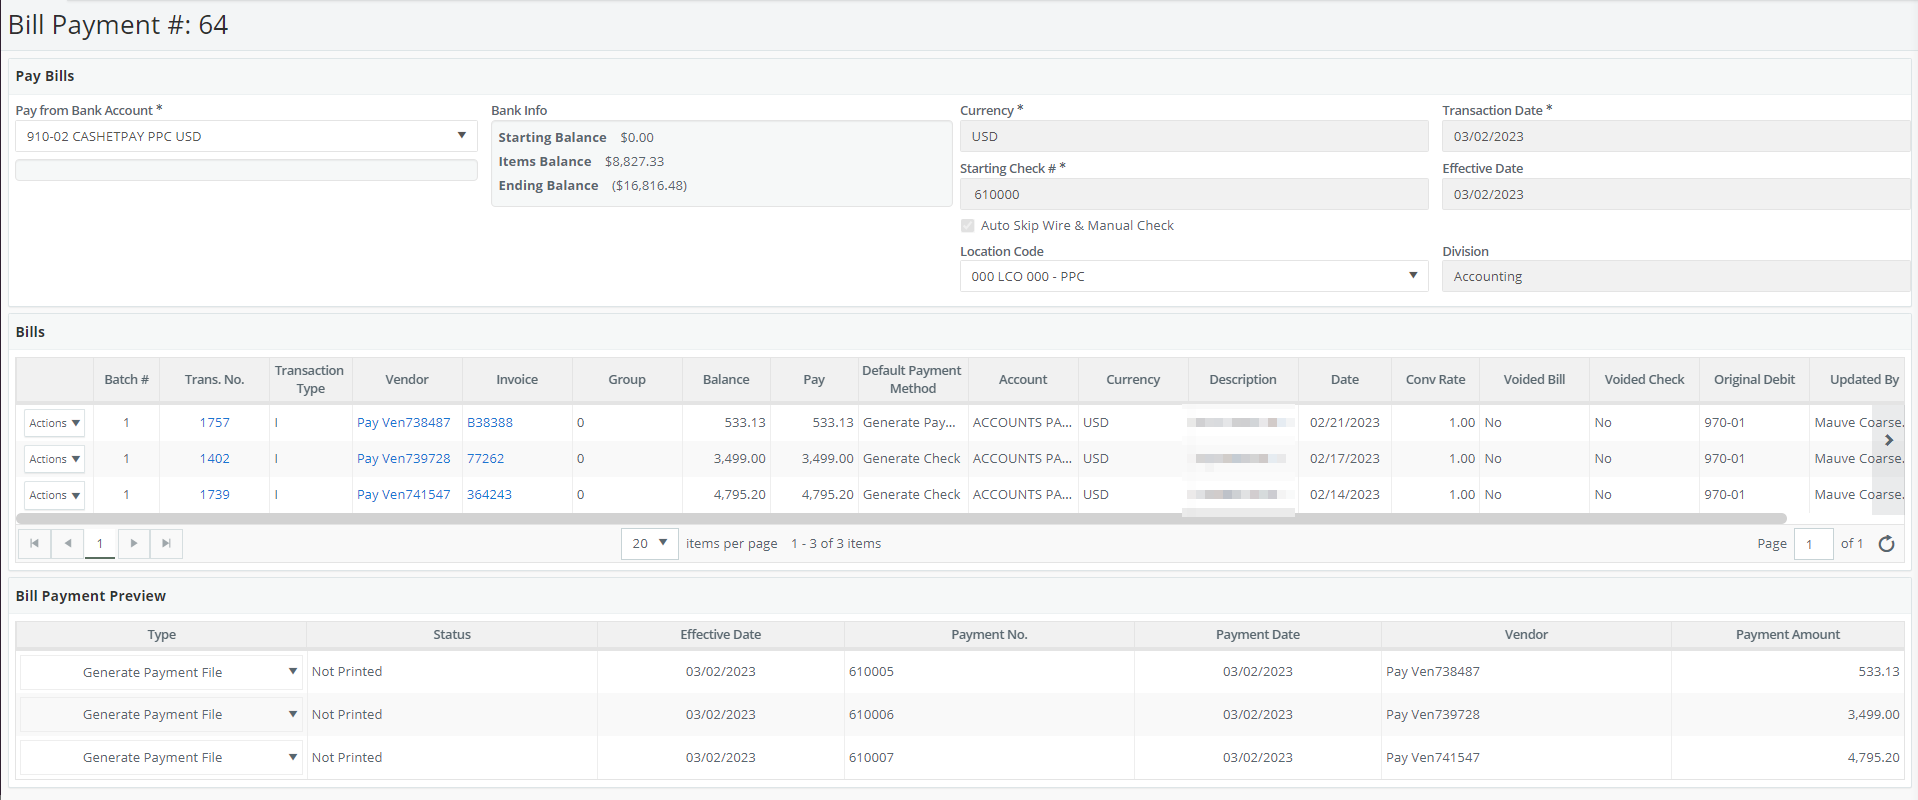
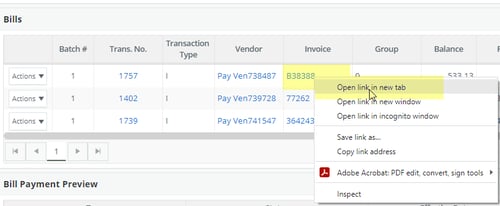
Tip: bills can be opened in a new tab for further reference by right-clicking on the number in the Invoice column.
4. Click Approve.

Note: once the bill payment has been fully approved, the payment file will automatically transmitted to CASHét by the GreenSlate system. The status column will update to Completed. No further action is needed.
Submit Bill for CASHétPay Direct Debit
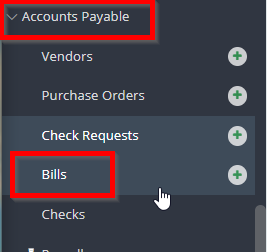
1. On the left navigation pane, go to Accounts Payable > Bills.
2. Click Create Bill.

3. Enter the following in the Summary section: select the CASHétPay vendor set up in the project; enter the Bill Payment ID in the Bill No. field; the amount of the bill payment in the Amount Due field and a description that indicates the bill is for CASHétPay Direct Debit. Finally, select the division for the bill as appropriate.
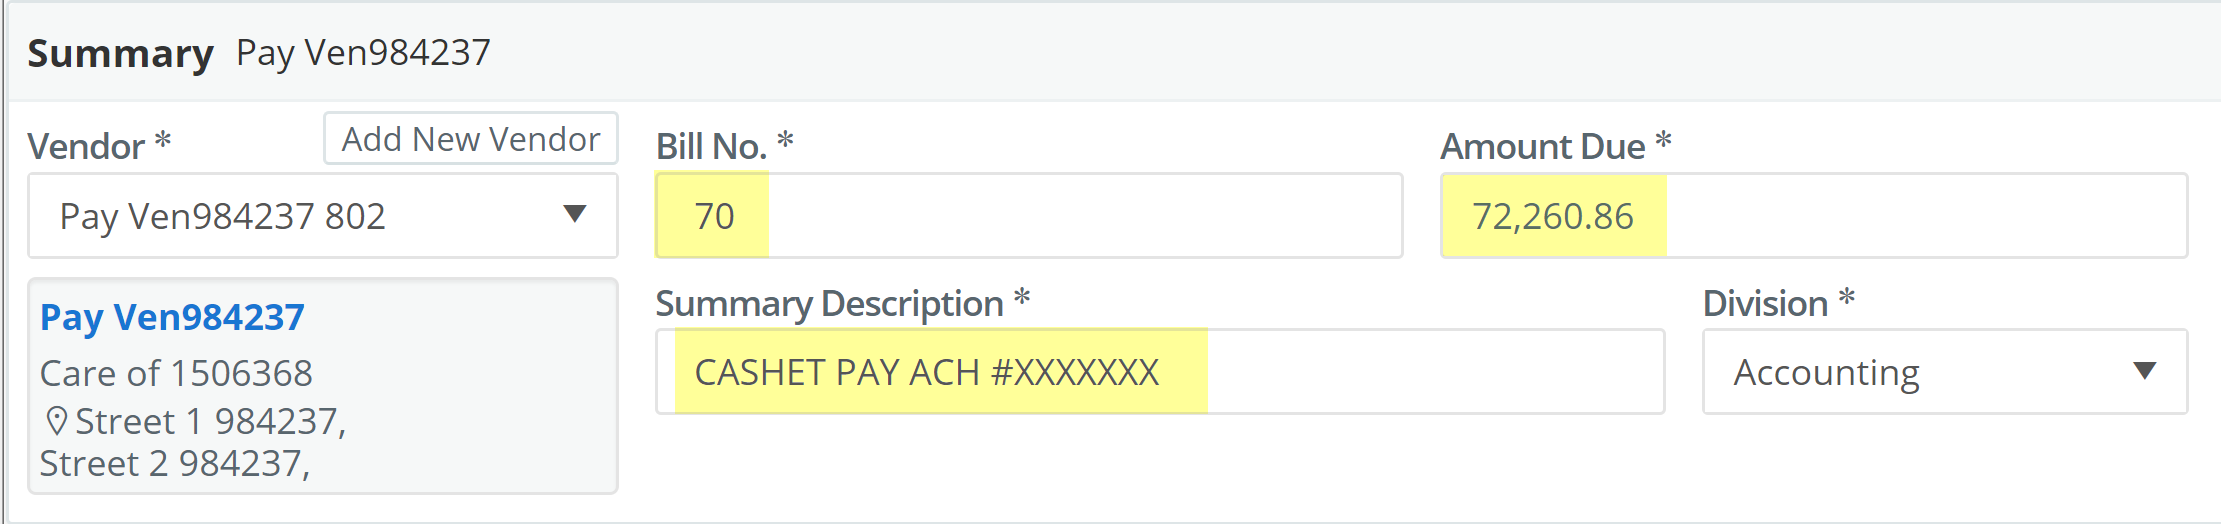
Tip: the Bill Payment ID can be found in the Bill Payments grid. 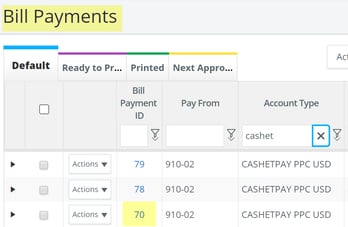
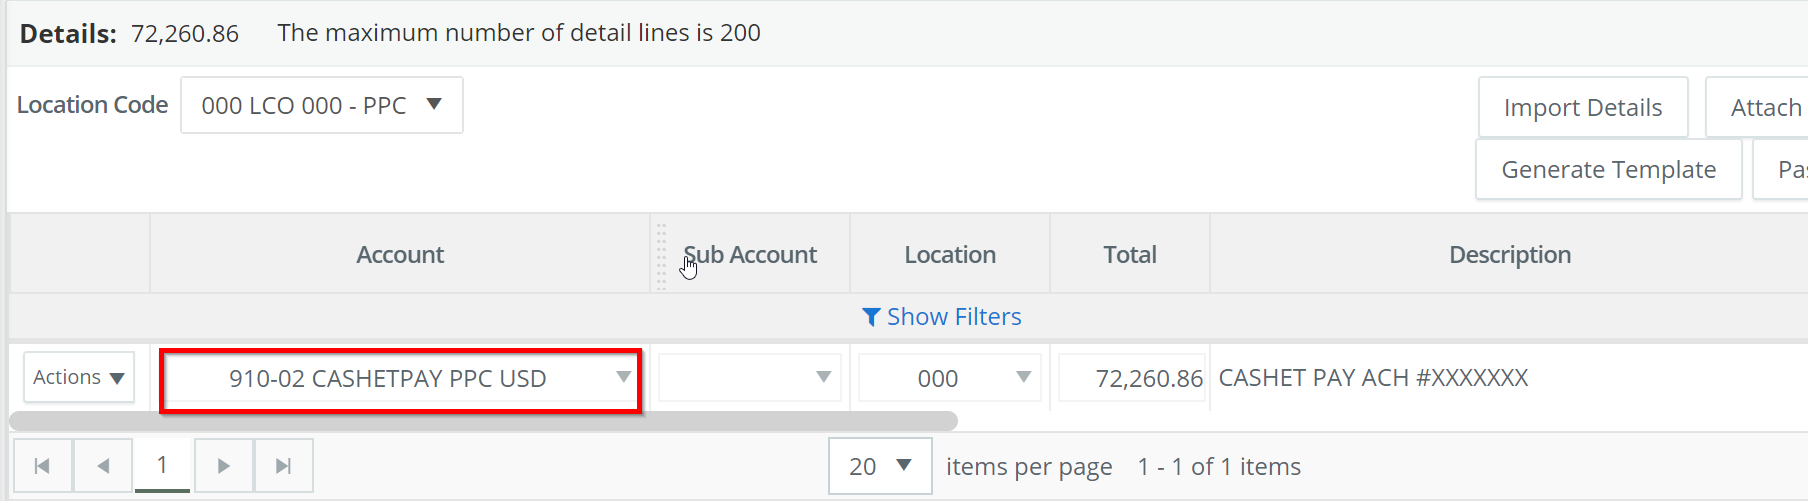
4. In the Details sections, select the CASHétPay GL account, 910-02. The Total and Description fields will auto-populate from the information entered in the Summary section.
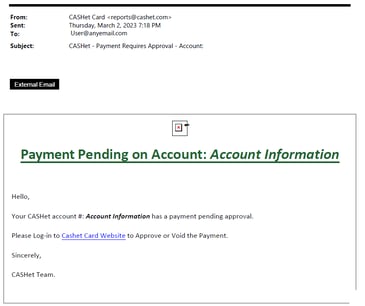
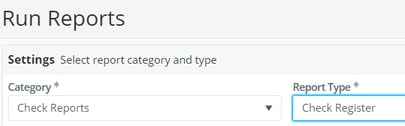
5. In the Files section, attach the CASHétPay Direct Debit email and the Check Register report listing the ACH payments included in the Bill Payment.
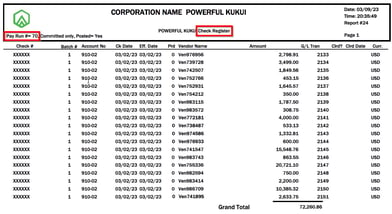
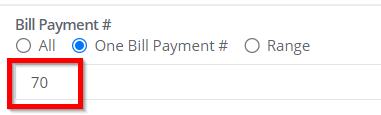
Tip: when running the Check Register report, enter the Bill Payment # to filter for the necessary checks.
6. Click Submit:
Submit Vendor Credit for CASHétPay Direct Debit:
1. On the left navigation pane, go to Accounts Payable > Bill Payments.
2. Click on Pay Bills.
3. Select the GL Account Code linked to the bank account used for CASHétPay Direct Debit.
4. Select the Location Code and Accounting Division. 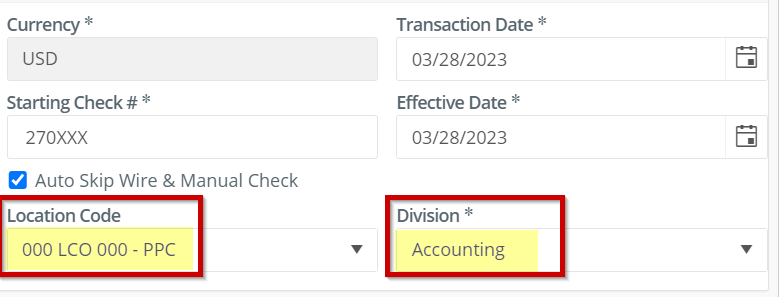
Tip: when creating a bill payment for the first time, the Starting Check # will need to be manually populated.
5. Click Add Bills.
6. Select CASHétPay bill for the direct debit and click Add Bills button in lower right corner.
7. Select Wire in the Payment type drop down menu. 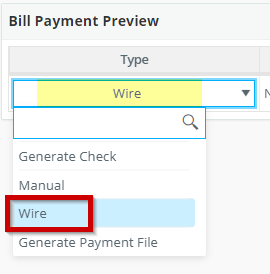
8. Click Submit.