
Options for Uploading CASHét
1) Copy and Paste from a CASHét Envelope download
2) Use an automated daily import of transactions to create Envelopes in our application
3) Manually upload your transactions
1) If you are using the CASHét CP Envelope Functionality:
You must request our customized GL string from CASHét in order to use this option.
Step 1: Fill out the PC envelope in the CASHét dashboard.
Step 2: Open the PC Envelope in the CASHét portal and click DOWNLOAD to Excel. This will download to the GreenSlate Copy/Paste format.
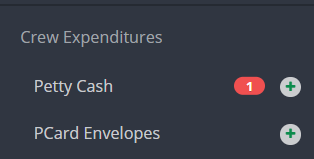
Step 3: Click the + to the right of PCard Envelopes on the left navigation.
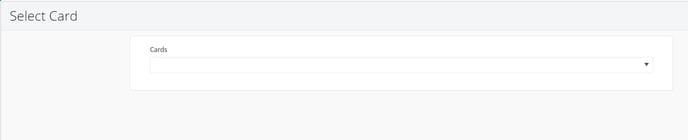
Step 4: Select the CASHét vendor from the Cards drop down menu and click SUBMIT.
Step 5: Copy the template from CASHét and while it is still highlighted, click PASTE.

Step 6: Enter an envelope # or check the box to auto generate and enter a description.
.csv%20-%20Excel.png?width=688&height=183&name=2021-05-09%2019_57_27-Template%20(12).csv%20-%20Excel.png)
Step 7: Enter the total of the detail lines in the Reimburse Amount field. This will create a credit and a debit line automatically to move funds back to the CASHét vendor's account.
.csv%20-%20Excel.png?width=688&height=439&name=2021-05-09%2019_59_44-Template%20(12).csv%20-%20Excel.png)
Step 8: Add notes and upload files as needed.
PRO TIP: Upload a PDF version of you CASHét Envelope for it be virtually paperclipped to this transaction's PDF in GreenSlate!

Step 9: Click SUBMIT.

2) If GreenSlate is importing your CASHét transactions for you:
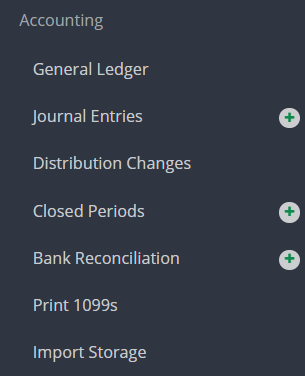
Step 1: Click IMPORT STORAGE on the left navigation.
Step 2: Click EDIT.

Step 3: Assign the CASHet vendor in the Vendor Name field to the appropriate transactions.

Step 4: Click SUBMIT.
.csv%20-%20Excel.png?width=688&height=147&name=2021-05-09%2020_07_20-Template%20(12).csv%20-%20Excel.png)
Step 5: Follow Steps 3 though 8 from above to submit the envelope.
3) If you are uploading your CASHét transactions manually:
Step 1: Complete and upload the template of transactions to Import Storage.
Step 2: Click the + to the right of PCard Envelopes on the left navigation.
Step 3: Select the CASHet vendor from the Cards drop down menu and click SUBMIT.
Step 4: Select the transactions in the Add Imports window then click ADD.

Step 5: Enter an envelope # or check the box to auto generate and enter a description.
Step 6: Enter the total of the detail lines in the Reimburse Amount field. This will create a credit and a debit line automatically to move funds back to the CASHet vendor's account.
Step 7: Add notes and upload files as needed.
Step 8: Click SUBMIT.