
- Help Center
- Accounting
- Key Accountant
How to: Set Up/Pay a CASHét Pay Vendor
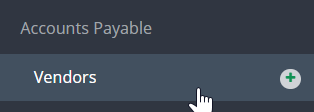
Step 1: Click VENDORS on the left navigation.
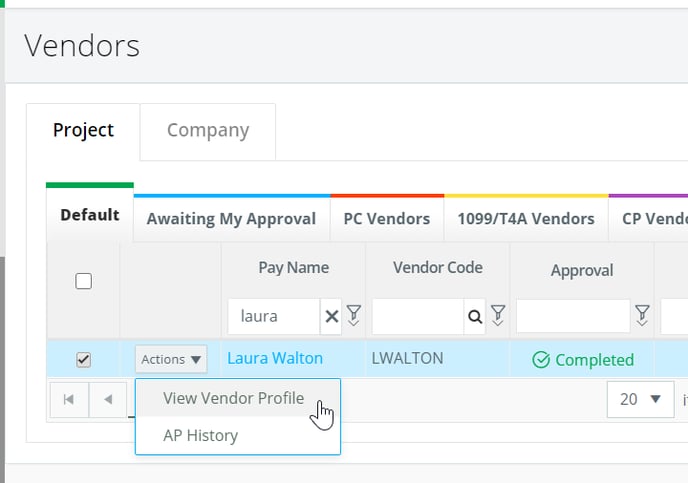
Step 2: Click VIEW VENDOR PROFILE via the Actions drop down menu for the vendor you would like to receive ACH.
Step 3: Click EDIT.

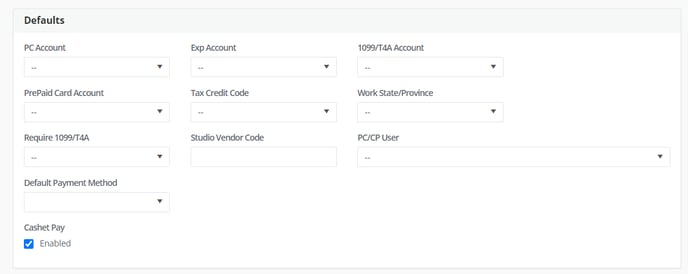
Step 5: Check the Cashet Pay Enabled box.
Step 6: Click SAVE.

Step 7: Create a bill payment to pay a bill for that vendor and select Generate Payment File as the check type.

Step 8: Approve the bill payment.
Selecting “Generate Payment File”, will generate the CashétPay file once the Bill Payment is submitted and fully approved. If there are any CashétPay Vendor requirements missing in the Vendor detail you will receive the error below. Go back to that Vendor complete the required fields.

Step 9: The file will be sent directly to CASHétPay automatically for processing.