Entering a timecard is quick and easy with GreenSlate.
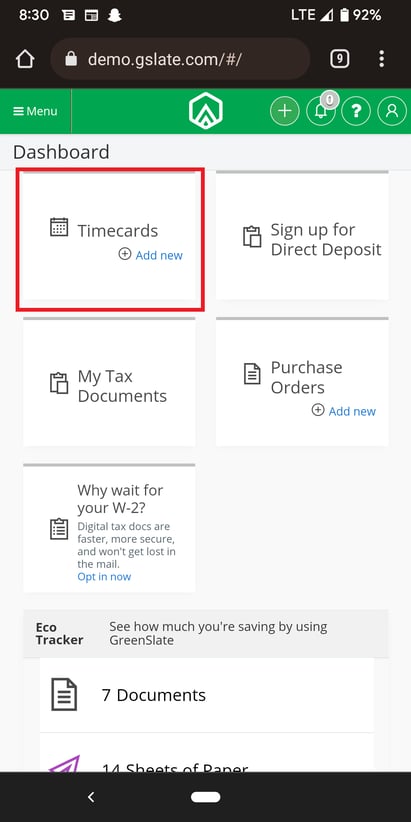
Step 1: From the Dashboard, Click CREATE TIMECARD.
Step 2: Select your weekending date and position and click CREATE.
NOTE: Your Primary Position is the position you are filling out the timecard for. If you have multiple positions but only see one of them listed, select that position and leave a note about this on the timecard for your employer. Notes section.
Step 3: Select HOURS.
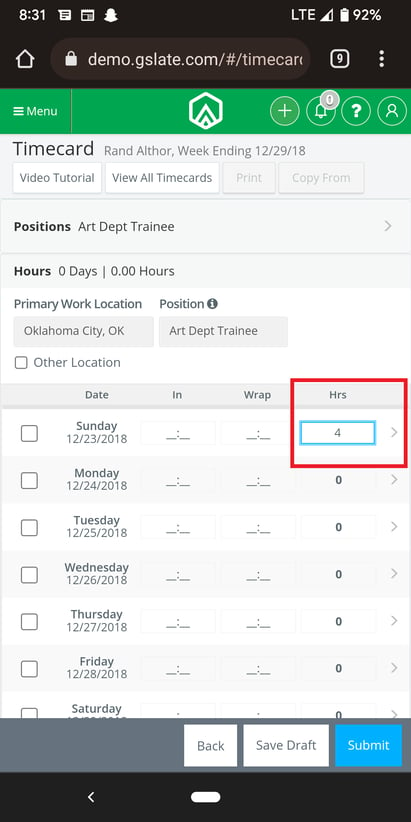
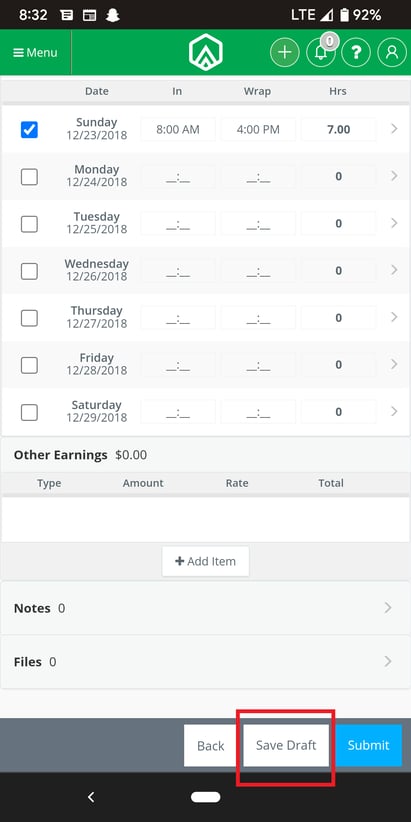
Step 4: Check the check-boxes for the days that you worked, and select the arrow to complete the details for that day.
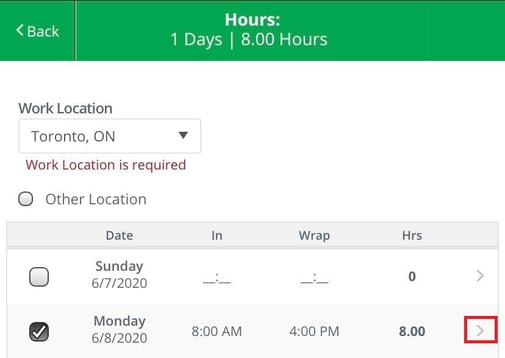
Step 5: Complete the details of the day worked.
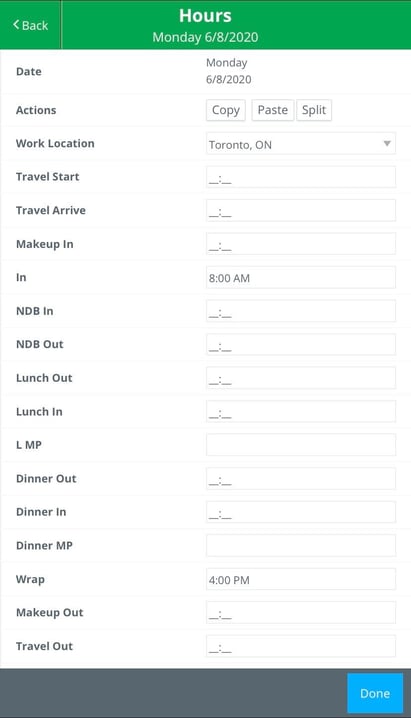
NOTE: Flat day rate or flat weekly rate employees will not enter in and wrap times. Only total hours.
Columns on your Timecard:
- Actions: You can use the Copy/Paste feature to enter the hours for one day, then copy and paste them to another day(s); You can use Split to split the day into multiple positions or Day Types
- Position: If you have multiple positions you will be able to choose the appropriate position for the day
- Worked: If the actual times do not have to be entered, you can check the Worked box to mark that you worked that day. (You can enter your hours in the Hours column if you like.)
- Day Type: Work, travel, vacation etc
- Position: The position you worked that day.
- In: Start of work day.
- Lunch: Start/end and meal penalty (MP) if applicable.
- Dinner: Start/end and meal penalty (MP) if applicable.
- End: End of work day (wrap).
- Hours: Total hours for the day.
Times can be entered in military time or by using AM and PM.
Step 6: Other earnings or reimbursements can be added in the "Other Earnings" area.
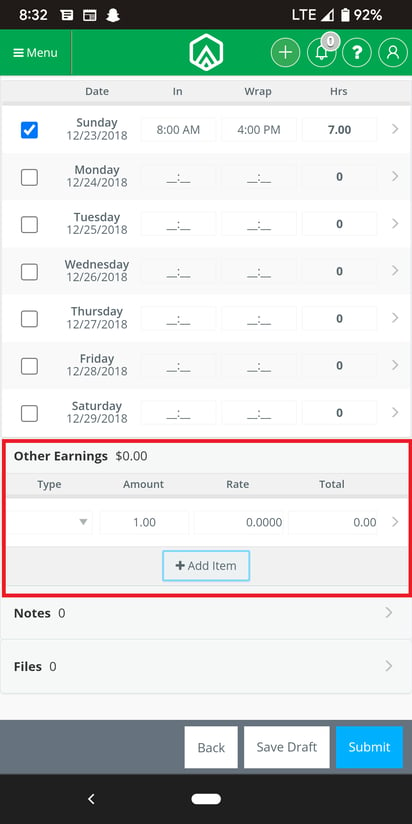
To add an other earning, select OTHER EARNINGS, click ADD ITEM, select your other earning type from the dropdown, confirm rate and amount, and click DONE
Step 7: Add any additional notes you may want to by clicking NOTES.
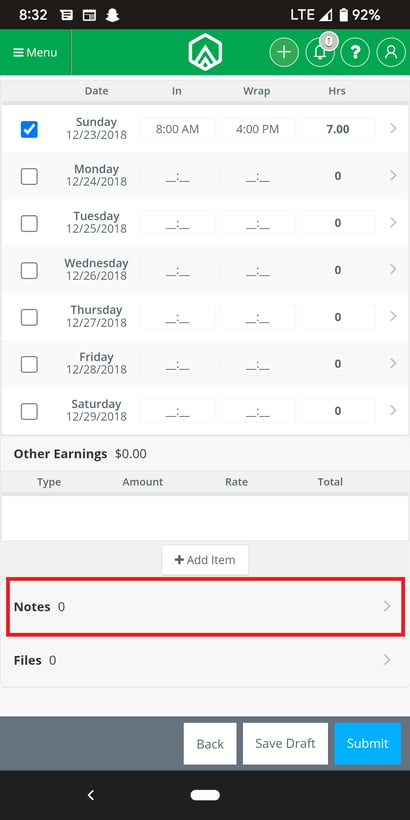
NOTE: You also have the option to save a draft of your timecard if you are not ready to submit your hours by clicking SAVE DRAFT.
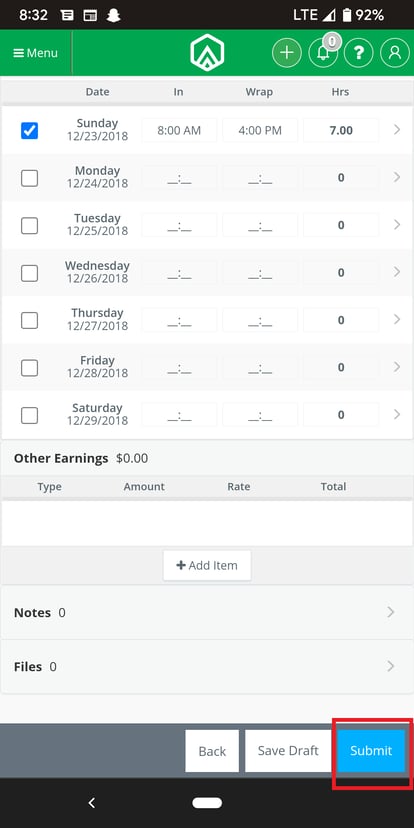
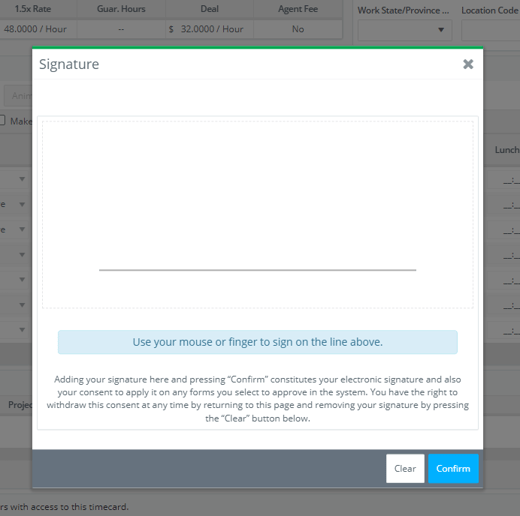
Step 8: Upon submitting your timecard, a window will open in which you can sign by holding the left mouse button if you are on a desktop computer or with your finger if you are using a mobile device. Once you sign your timecard, it will become read-only for your employer. If your employer notices any changes that need to be made, he/she will reject the timecard back to you with notes.
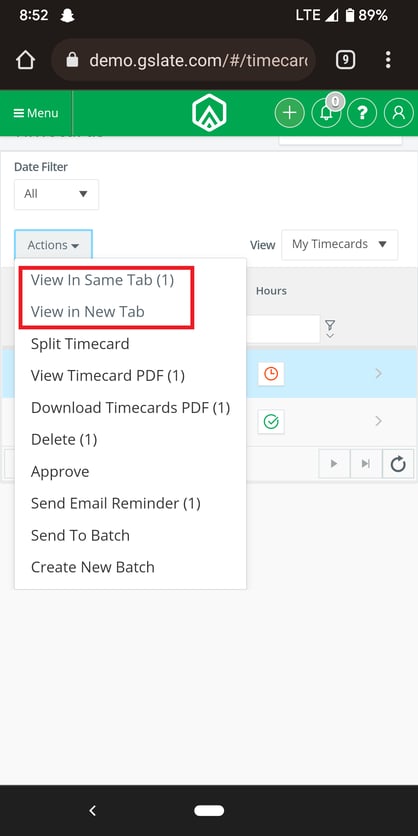
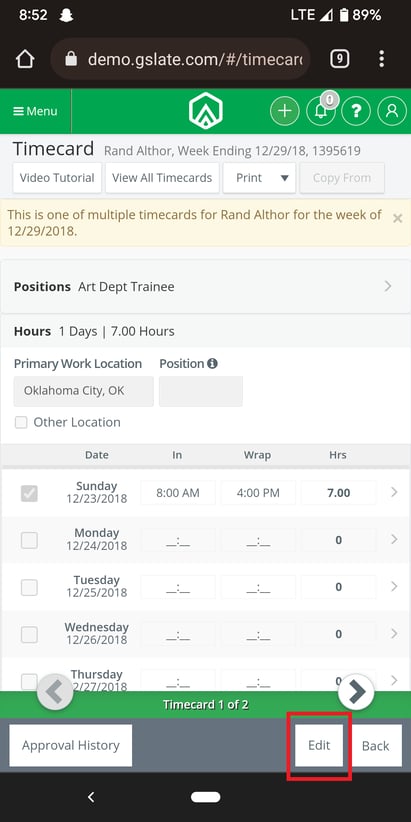
If you've made a mistake on your timecard, you can access your timecard again by clicking VIEW from the Timecards page and then click EDIT to make changes. This option is only available if your timecard has not yet been approved by your employer.